• Skip to primary navigation
  • Skip to main content
  • Skip to primary sidebar
Kitchen Collisions
  • Home
  • About
  • Contact

New York Pizza dough

February 25, 2022 by baerrs Leave a Comment

NY PIzza

This has been years in making, but recently I've been focusing my spare time researching what defines a NY Pizza.. and from what I've found out, it's more of what it's not than anything else.   And who knows, maybe it is really the water.  I initially said this tongue and cheek, but in reality, when researching a lot of things made sense to me.   Specifically the yeast's reaction to other elements in the water.   But I'm not here to debate that, there are plenty of sites you/we can do that on.  I think this is the is in the ballpark.  

The 4 most important things are the dough (this page), technique, sauce, and cheese.  For the last two, it is pretty simple.  Whole canned tomatoes, crushed yourself, and low-moister whole milk mozzarella.  I can only find this pre-shredded, and it works.  The second one, technique, can take years to perfect but you can get pretty close to it quickly.  The biggest one here is the proper heating up of the oven and the cooking media.  I've used the ceramic pizza rounds, I've even used unglazed tiles from home depot which did wonder.  

Going from the ceramic pizza stone to unglazed tiles to a Baking Steel, have all been for the better, but the Steel was the single significant improvement I would recommend to anyone (I'm not an affiliate ---> means I don't make money for saying this).  

OK, here it is... 

NY PIzza

New York Style Pizza Dough v2

NY Pizza Dough version #2... so much better than my first attempt
5 from 1 vote
Print Pin Rate Share
Course: Appetizer, Main Course, Snack
Cuisine: American, Italian
Prep Time: 15 minutes minutes
Cook Time: 8 minutes minutes
1 day day 1 hour hour
Total Time: 1 day day 1 hour hour 23 minutes minutes
Prevent your screen from going dark

Ingredients

Wet -- let this sit for 5 min, or until you can see activity in the bowl. It usually takes around 2 mins.

  • 659.5 g water about 100 deg F
  • 16.2 g Sugar 
  • 5.4 g Instant Dry Yeast

Dry

  • 1072.4 g flour bread
  • 16.2 g  Kosher Salt Morton's 

After dough has formed, but not fully kneeded

  • 10.7 g Olive Oil

Instructions

Wet

  • Mix the water (100F), sugar, and Yeast. Let this sit till you see activity in the water. While you are waiting, mix your dry ingredients

Dry

  • Add ½ of the flour to the wet ingredents. and mix on low for 4 min.
  • Add the rest of the flour and salt. Mix on medium speed till combined.

Olive Oil

  • Now add the olive oil, and mix on low for 8-10 mins. You want the temp to be 80 to 85 deg F. The time will very depending on the ambiant temp of your working envirment a and the temputure of the water you used.

Dough Balls

  • For this recipe. I divide the balls into 4 equal pieces. Weigh them to insure they are all around 15.5 oz.

Fermitation

  • Place the dough balls in plastic containers. Let them rest in the refrigerator overnight, or a min of 12 hrs.

Pre-heat the oven and bring your dough balls to room temp.

  • Pre-heat your oven and cooking media (I use baking steel ). I'm limited by my oven to 499 deg F.. don't ask why I can't do 500.

Notes

If you dont want to wait for the overnight rise. 
Increase yeast by 50%
Decrrease suger by 50%
Increse water by 2% 
Increase water temp by 15 deg
Let sit at room temp for 1 hr, brush with olive oil so it doesn't dry out.  

Nutrition

Serving: 1g

Now once you've made the dough.  Put it in some plastic containers with olive oil and put it in the refrigerator for a min of 12 hrs.  

After the 12hr wait, there is still more waiting but it's worth it.  Take the dough out and let it sit at room temperature for a min of 1 hr.  And guess what that's the same about of time required for my backing steel to heat up.  My oven has issues and I cant heat it up to 500, but it can do 499F, so that's what I do.  If you can get yours to 550, that would be great.   

No aerial technic needed here, it's easy to shape by hand.  There are plenty of videos to show this process. So leave the rolling pin in the draw.  We may be making pie, but not that kind of pie; use your hands. The basics are to flatten the dough ball into to disk shape, press down with your fingers to form an edge (I do this on both sides).  Then pick up the dough with the edge above your knuckles and let gravity work with you.  You can spread your hand apart and move the dough around.  Add a little sauce and cheese.. and then we are oven bound.  

In my oven it takes 8 mins.  

Which is about the time it takes to eat...  

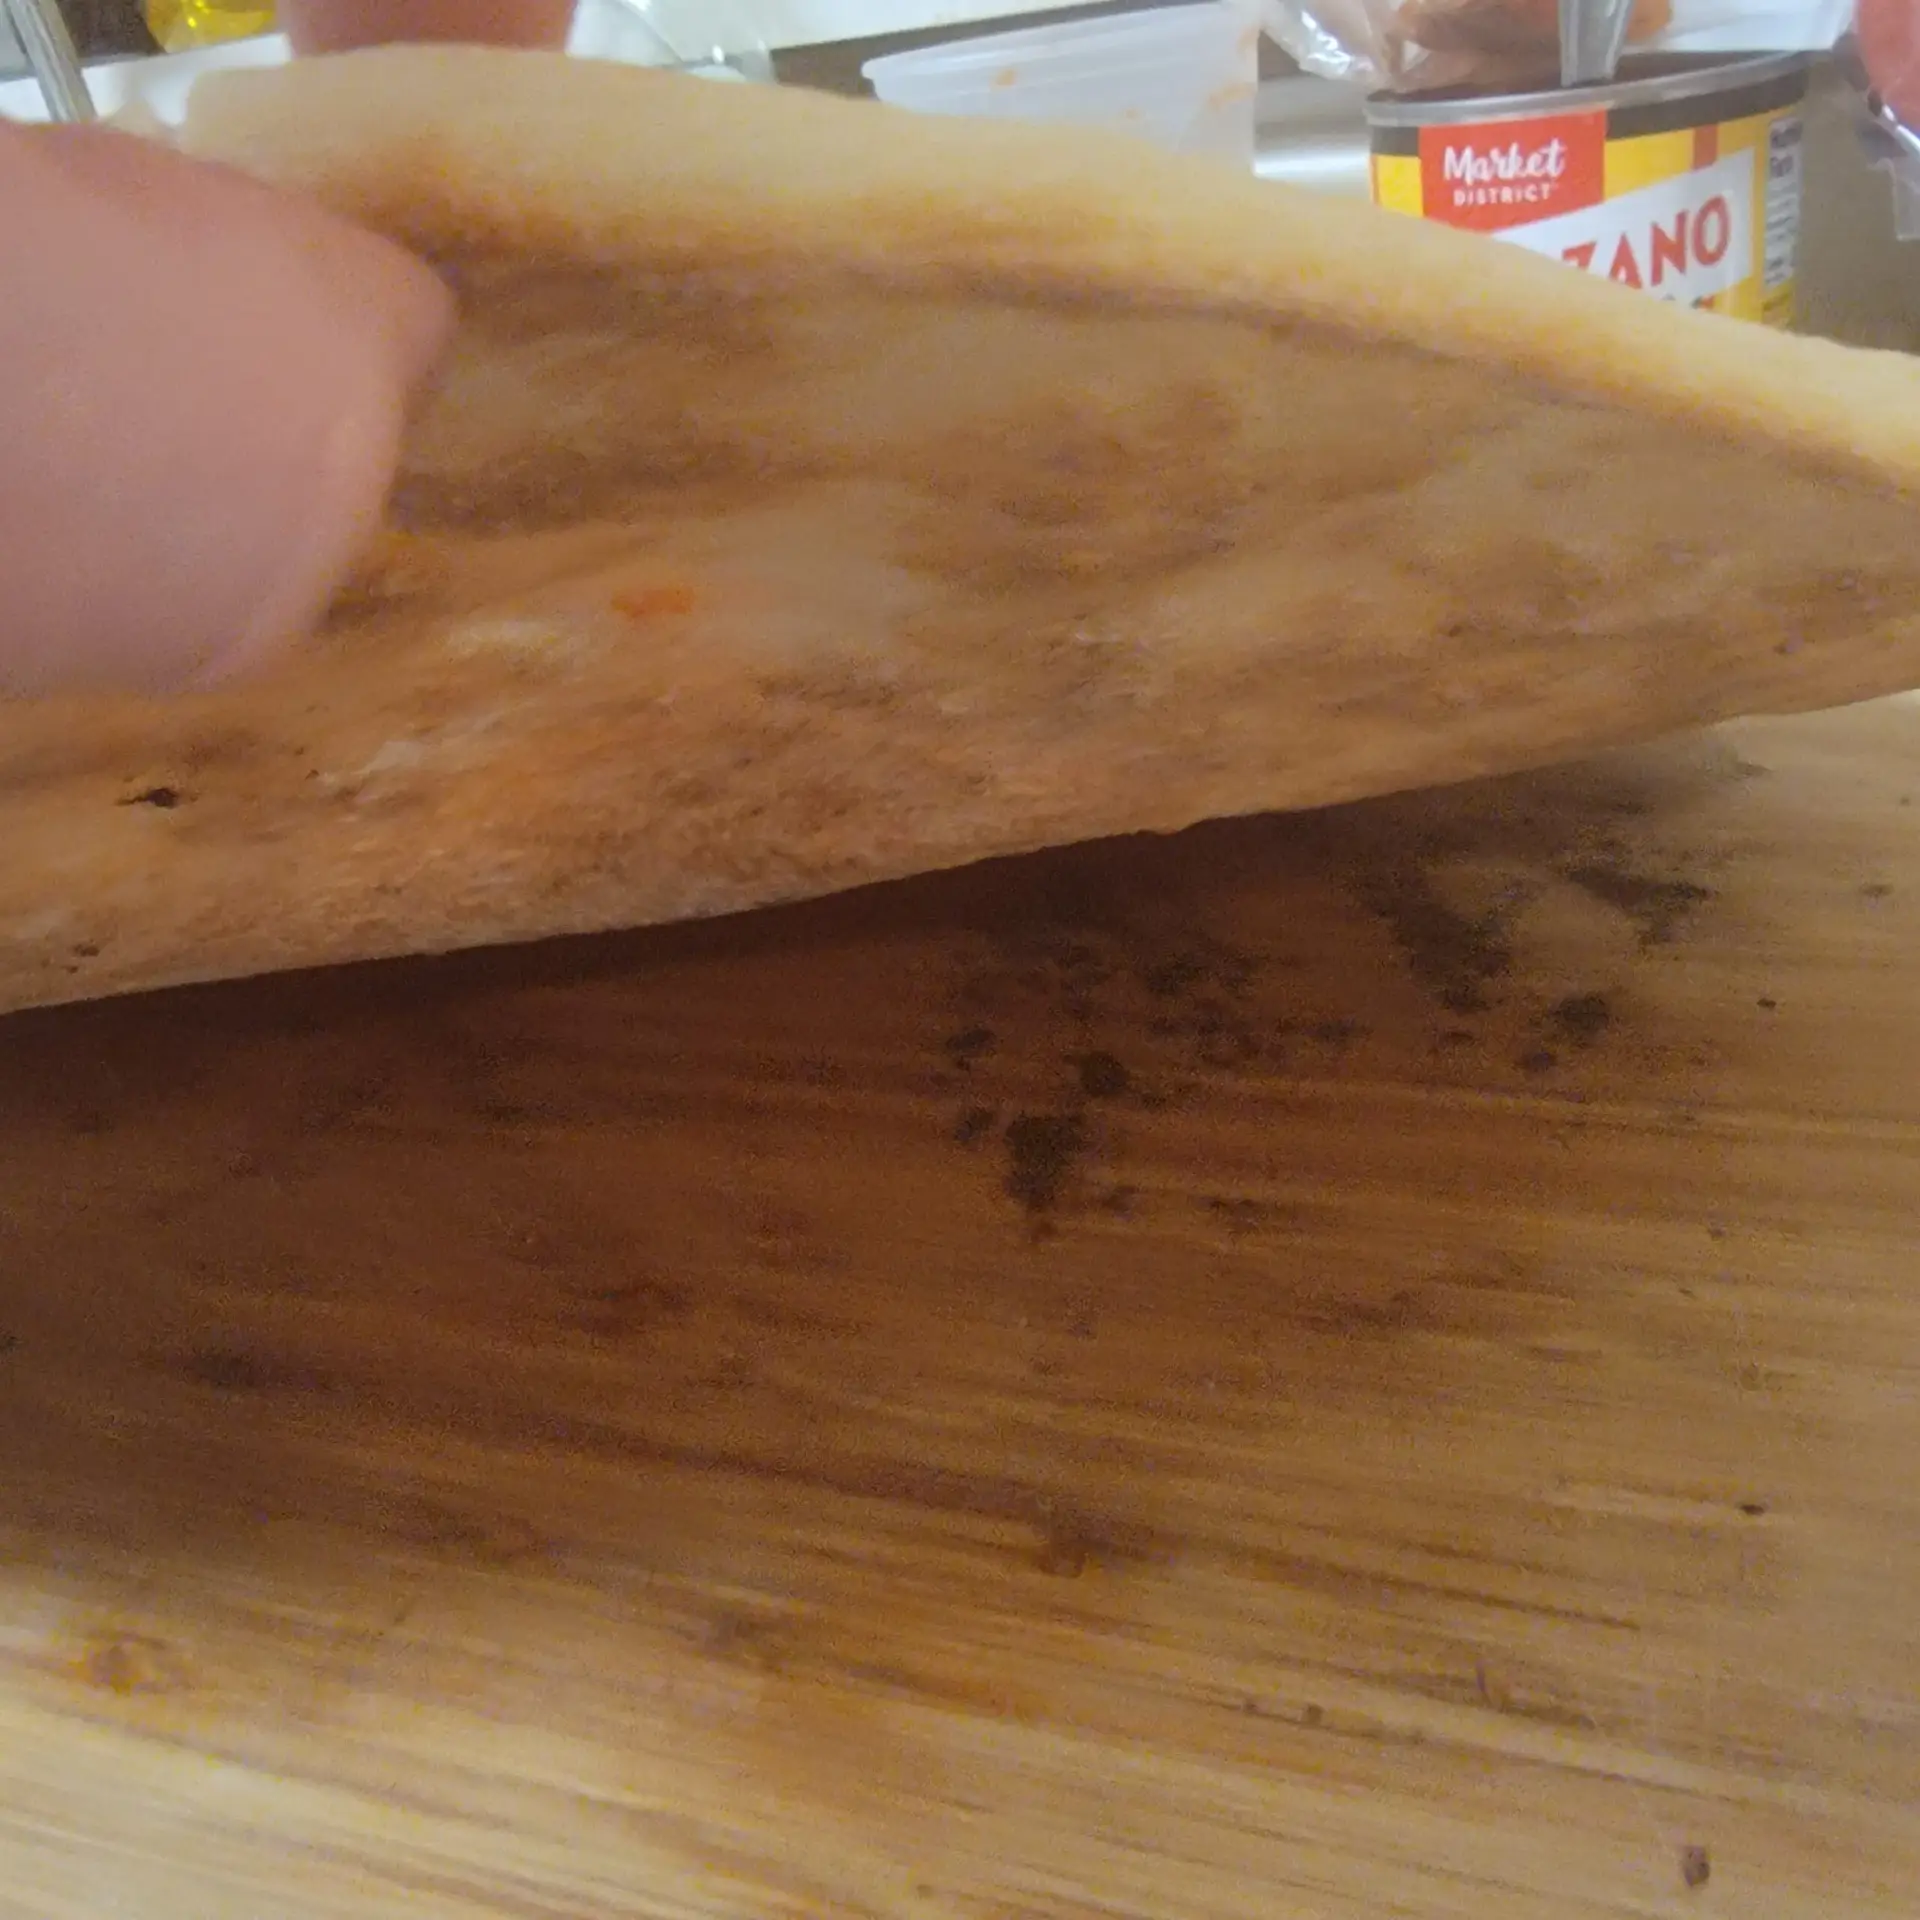
Nice browning on the bottom

The dough i nice and crunch on the edge, good bite and very foldable like traditional NY Pizza.

The QR code below is here if you want to start with this recipe but want to change something.  Including how many dough balls you want, or the size of the final dough ball/pizza size.  

I have to give props to Tom Lehmann (a.k.a. "The Dough Doctor")Director, Bakery Assistance

The American Institute of Baking

Filed Under: Recipe

Reader Interactions

5 from 1 vote (1 rating without comment)

Leave a Reply Cancel reply

Your email address will not be published. Required fields are marked *

Recipe Rating


Primary Sidebar

Footer

About

  • Privacy Policy
  • Disclaimer
  • Terms & Conditions
  • Accessibility Policy

Newsletter

  • Sign Up! for emails and updates

Contact

  • Contact
  • Services
  • Media Kit
  • FAQ

As an Amazon Associate I earn from qualifying purchases.

Copyright © 2020 Brunch Pro on the Brunch Pro Theme

Rate This Recipe

Your vote:


A rating is required
A name is required
An email is required

Recipe Ratings without Comment

Something went wrong. Please try again.